
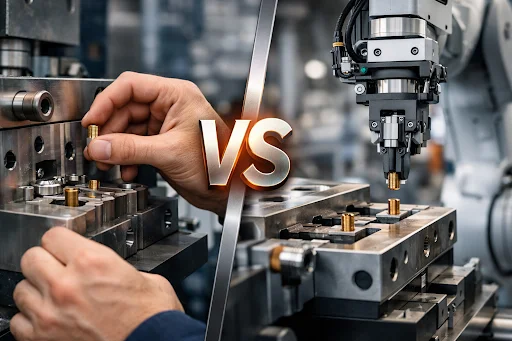
In insert molding solutions, the expensive problems rarely come from resin or machine settings. They come from inserts: wrong orientation, missed inserts, or slight shifts that kill pull-out strength. Manual loading can work, but it creates variation. Robotic placement reduces that variation at the cost of added system complexity. This guide compares both so you can choose the right level of automation.
Why Insert Placement Is the Real Bottleneck
Insert molding combines multiple functions into a single molded part, eliminating secondary assembly steps. While this simplifies the final product, it places greater pressure on the molding process itself especially the insert placement step.
If an insert is misplaced, missing, or misoriented, the entire molded part may be scrapped. In some cases, the defect is not immediately visible, creating downstream quality or safety risks. As production volume increases, small variations in how inserts are handled can quickly turn into large yield losses.
This is why the discussion around insert molding solutions often centers on how inserts are loaded. Manual loading and robotic placement each offer advantages, but they solve different problems. Understanding those differences is essential before committing to a production strategy.
Quick Primer: What “Insert Placement” Actually Involves
An insert can take many forms: threaded nuts, metal terminals, bushings, pins, plates, or magnetic components. Regardless of shape, every insert must be placed correctly before plastic is injected.
The basic placement sequence includes several steps: picking the insert, identifying its orientation, positioning it in the cavity or fixture, confirming it is fully seated, closing the mold, injecting plastic, and then ejecting the finished part. Each step introduces potential variation.
Among these steps, three variables matter most: orientation, position, and seating confirmation. Even small deviations can affect bonding, pull-out strength, electrical contact, or cosmetic quality. Effective insert molding solutions are built around controlling these variables, either through human procedures or automated systems.
Manual Loading: Where It Works Well
Manual Loading: Flexible, Low Upfront Cost, Higher Process Dependency
Manual insert loading remains common, especially in early-stage or low-volume programs. Its primary advantage is flexibility. Setup is fast, capital investment is low, and operators can adapt quickly to design changes or mixed insert types.
This approach works well for prototyping, bridge production, or projects with frequent insert changes. Parts with simple geometry and generous tolerances are also good candidates. In these cases, the cost and complexity of automation may not be justified.
Typical manual setups include trained operators, basic locating features, guide pins, and simple poka-yoke fixtures. When executed carefully, manual loading can achieve acceptable quality levels. However, the process relies heavily on operator attention, consistency, and discipline, which introduces inherent variability.
Manual Loading Risks: The “Hidden Costs”
The limitations of manual loading become more visible as production scales.
Common risks include:
- Misplaced, missing, or reversed inserts, leading to scrap or latent defects
- Positional shift that reduces encapsulation or pull-out strength
- Cycle time variation across operators or shifts
- Operator fatigue and safety risks from repetitive handling
- Weak traceability, as individual placement confirmation is difficult
While labor cost is often cited as the drawback of manual loading, the larger cost typically comes from scrap, rework, downtime, and customer complaints. These hidden costs can outweigh any savings from avoiding automation, particularly in quality-sensitive applications.
Robotic Insert Placement: What You Gain
Robotic Placement: Repeatability, Validation, and Scale
Robotic insert placement introduces consistency into the most variable step of insert molding solutions. Systems may use Cartesian robots, SCARA arms, six-axis robots, or gantry systems, combined with feeders such as bowls, magazines, or tape reels. Vision systems and sensors are often integrated.
The primary benefit is repeatability. The orientation, position, and placement force can be tightly controlled. Cycle times become predictable, and process variation between shifts is minimized.
Automation also enables in-process validation. Sensors can confirm insert presence, vision systems can verify orientation, and alarms can stop production if an error is detected. This transforms insert placement from a manual task into a controlled and verifiable process.
For higher volumes, robotic cells can be replicated across multiple machines, supporting consistent scale-up without proportional increases in labor.
Robotic Placement Trade-offs: Complexity You Must Manage
Automation reduces human variability, but it introduces system-level complexity.
Upfront engineering effort is required to design end-of-arm tooling, fixtures, feeders, and inspection logic. Insert quality becomes more critical—burrs, deformation, or inconsistent packaging can disrupt automated feeding.
Changeovers may require more planning, especially for projects with multiple insert variants. Maintenance also becomes part of the equation, as grippers, sensors, cameras, and feeders require monitoring and periodic replacement.
In short, robotic placement lowers process risk but raises engineering and integration requirements. Successful automation depends on treating insert placement as a system, not just a robot add-on.
Head-to-Head Comparison: Manual vs Robotic
When comparing manual and robotic insert placement, the differences become clear:
| Comparison Area | Manual Loading | Robotic Insert Placement |
| Best-fit production volume | Prototypes, low-volume runs, frequent changeovers | Medium to high volume, long-term stable production |
| Cycle time stability | Varies by operator skill and shift consistency | Highly repeatable and predictable |
| Typical failure modes | Missing inserts, wrong orientation, partial seating; mainly human error | Feeding jams, gripper or fixture wear, sensor/vision faults; mainly system-related |
| Changeover flexibility | Fast and flexible for different inserts or part variants | Requires structured programs, tooling, and feeder adjustments |
| Verification & traceability | Limited; usually relies on work instructions and sampling | Strong; supports presence checks, orientation detection, and data logging |
| Labor dependency | High; process performance depends on operator consistency | Low; performance depends more on system design and maintenance |
| Upfront investment | Low; basic fixtures and procedures are sufficient | High; robot/automation cell, EOAT, feeders, sensors, and integration |
| Unit cost at scale | Increases with volume due to labor and variability | Decreases at scale as automation cost is amortized |
If insert-related defects carry high cost or high risk, robotic placement is usually the safer path. If volumes are low and changeovers are frequent, manual loading with strong fixtures and checks can be the more practical choice.
Decision Framework: When to Automate Insert Molding Solutions
Automation should be triggered by throughput, risk, and verification needs.
1) Throughput trigger: will manual loading hold the cycle?
Automate when:
- You run multi-shift production and need the same cycle time every shift.
- Cycle time is tight and manual placement becomes the bottleneck or causes frequent micro-stops.
2) Risk trigger: what happens if one insert is wrong?
Automate when:
- A missing/ flipped/ mis-seated insert can cause functional failure (electrical contact, fastener retention, sealing).
- Insert position directly affects pull-out strength or seal performance (small offsets = big rejects).
This is especially common in electronics injection molding, where terminal orientation and seating directly affect contact reliability.
3) Verification trigger: does the customer expect proof?
Automate when:
- The customer asks for documented verification / traceability (presence check, orientation confirmation, logging).
- Delivery depends on stable OEE and you cannot afford scrap spikes or rework loops.
When manual or semi-automation is still the better choice
Stay manual (or add simple sensors/fixtures) when:
- Volumes are low, designs change often, or insert variants change frequently.
- The real cost driver is not labor—it’s not having the right fixtures + poka-yoke checks in place.
Automation is usually justified when the cost of one placement error (scrap, downtime, field risk) exceeds the cost of controlling placement with a robot and validation.
Practical Implementation Options: Semi-Automation Is Often the First Step
Many insert molding solutions evolve gradually.
A typical progression includes:
- Level 0: Manual placement with basic guides
- Level 1: Manual placement with sensors or presence detection
- Level 2: Collaborative robots for pick-and-place, with manual feeding
- Level 3: Fully automated systems with feeding, vision, and data logging
For many programs, Levels 1 or 2 deliver the largest quality improvement with manageable investment, significantly reducing placement errors before full automation is considered.
Conclusion: Choosing the Right Automation Level
Manual loading offers flexibility and low upfront cost, but depends heavily on human consistency. Robotic insert placement delivers repeatability, validation, and scalability at the cost of higher system complexity.
The right choice for insert molding solutions is not defined by how advanced the equipment looks. It is defined by production volume, risk tolerance, and quality requirements. Evaluating these factors objectively leads to a placement strategy that supports both short-term efficiency and long-term reliability.