
A dry basement isn’t just about comfort—it’s about protection. Your home’s foundation, structure, and even your health can be compromised by one thing: water. Whether it enters from rain, a rising water table, or interior leaks, moisture in the basement is a threat that demands a long-term solution. Installing sump pumps plays a vital role in keeping your home protected, notes RGroup Property Management Solutions.
A sump pump is one of the most reliable and effective tools in a homeowner’s arsenal to combat basement flooding. When properly installed and maintained, it serves as a powerful defense system, actively removing unwanted water from your basement and redirecting it safely away from your home. For those serious about basement waterproofing, sump pumps are often the centerpiece of a comprehensive protection plan.
In this guide, we’ll explore everything you need to know about sump pumps—from how they work and why they’re important, to step-by-step installation tips and long-term benefits. Whether you’re facing persistent basement moisture or planning for future protection, understanding the value of sump pump installation is key.
What Is a Sump Pump?
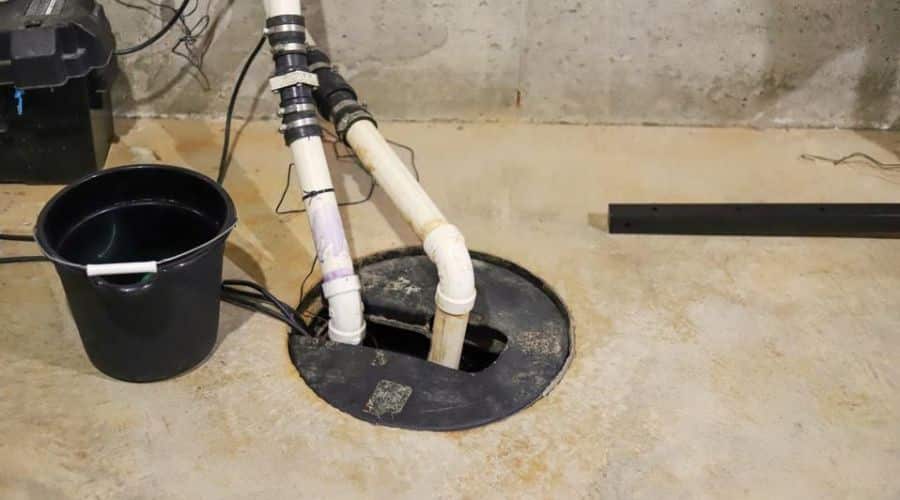
A sump pump is a device installed in the lowest part of a basement or crawlspace, typically within a specially constructed pit called a sump basin. Its job is to collect and pump water away from your home’s foundation before it can cause damage.
Sump pumps are triggered automatically when water levels rise in the sump basin. As the water reaches a preset level, a float switch activates the pump, which then forces the water through a discharge pipe and away from the home—usually into a storm drain or a dry well.
There are two main types of sump pumps:
- Submersible Pumps – Installed inside the sump pit and sealed for underwater operation. These are quieter and more efficient for heavy-duty use.
- Pedestal Pumps – Positioned above the pit, with the motor outside the water. Easier to access for maintenance, though typically louder and less powerful.
Why Installing Sump Pumps Matters
1. Protects Against Basement Flooding
Heavy rains, melting snow, and rising groundwater can all lead to water pooling in your basement. A sump pump actively removes this water before it can accumulate.
2. Prevents Structural Damage
Prolonged exposure to moisture weakens concrete, corrodes metal, and causes wood rot. Over time, this compromises your foundation, framing, and flooring.
3. Improves Indoor Air Quality
Damp basements contribute to high humidity and mold growth. By removing water quickly, sump pumps help maintain a dry environment that supports cleaner, healthier air.
4. Reduces Risk of Mold and Mildew
Mold thrives in moist conditions. Keeping the basement dry deters mold growth on walls, floors, insulation, and furniture—preserving both health and property.
5. Supports Basement Waterproofing Systems
A sump pump is often part of a larger basement waterproofing strategy that may include interior drain tiles, vapor barriers, and dehumidifiers.
When to Install a Sump Pump
Not every basement needs a sump pump, but many would benefit from one. Here are signs you may need to install or upgrade a sump pump:
- Basement has flooded or experienced standing water
- You notice a persistent musty odor or signs of mold
- Foundation walls are damp or have water stains
- There’s visible condensation or dripping pipes
- High water table in your region
- Basement finishes or belongings are water-damaged
- Your home is in a low-lying or flood-prone area
Even if you haven’t experienced water issues yet, installing sump pumps proactively can save you thousands in future repair costs.
Tools and Materials Needed for Installation
Tools:
- Jackhammer or concrete saw
- Shovel
- Level
- Tape measure
- Drill
- PVC pipe cutter
Materials:
- Sump pump (submersible or pedestal)
- Sump basin (plastic or fiberglass)
- Gravel
- Concrete mix
- Check valve
- PVC discharge pipe and fittings
- Silicone or waterproof sealant
If you’re not comfortable with power tools or plumbing work, professional installation is a smart and safe choice.
How to Install a Sump Pump (Step-by-Step)
Step 1: Choose the Right Location
Select a location at the lowest point of your basement floor—where water naturally pools. It should be near a power source and accessible to a discharge route.
Step 2: Excavate the Sump Pit
Use a jackhammer or saw to cut a hole through the concrete floor large enough to accommodate the sump basin (usually around 2 feet deep and 18 inches wide). Dig down into the earth to allow the basin to sit flush with the floor.
Step 3: Set the Basin in Place
Place a few inches of gravel at the bottom of the hole. Set the basin in the hole, ensuring it’s level and stable. Backfill around it with gravel up to 2–3 inches below the top of the pit.
Step 4: Install the Sump Pump
Lower the pump into the pit. Attach the check valve to the pump’s outlet—this prevents water from flowing back into the basin after it’s pumped out.
Step 5: Connect the Discharge Pipe
Attach PVC piping to the check valve, running it up and out through a hole drilled in the rim joist or foundation wall. Ensure the pipe has a downward slope away from your home to encourage proper drainage.
Step 6: Seal and Test
Seal around the pipe exit point with waterproof caulk or expanding foam. Plug in the pump and pour water into the basin to test the activation and drainage. Make sure the float switch operates smoothly.
Step 7: Patch the Concrete
Use concrete mix to patch around the basin and restore the floor’s integrity. Allow to cure fully before finishing the area.
Integrating a Backup System
Power outages often accompany storms—the same storms that flood basements. That’s why a backup system is essential. Options include:
- Battery Backup Sump Pump: Kicks in when the main unit fails or loses power.
- Water-Powered Backup Pump: Uses your home’s water pressure to remove water (requires municipal water connection).
- Wi-Fi Alerts and Smart Pumps: Notify you of pump activity or failure in real-time via smartphone.
These systems add another layer of protection and peace of mind—especially for finished basements or storage areas.
Sump Pump Maintenance Tips
Like any mechanical system, sump pumps require routine checks to ensure peak performance:
- Test the pump every 2–3 months by pouring water into the basin.
- Clean the pit and pump inlet screen annually to remove debris.
Ensure the discharge pipe is free from clogs and slopes properly. - Check the backup system monthly to verify it’s charged and operational.
- Inspect the check valve and replace it if water flows backward.
Regular maintenance extends the life of your system and prevents costly surprises when you need it most.
Common Mistakes to Avoid
- Poorly Sloped Discharge Pipe: Water should flow away from the foundation, not pool around it.
- Lack of Check Valve: Without this, water can backflow and cause flooding.
- Improper Sealing: Unsealed or poorly sealed basins allow moisture and odors into the basement.
- Overloading Circuits: Avoid plugging your sump pump into an overloaded outlet.
- No Backup Power: A single power failure can render your system useless if not backed up.
Each of these mistakes undermines the effectiveness of the system and can put your home at risk.
How Installing Sump Pumps Supports Basement Waterproofing
A basement waterproofing strategy often includes multiple components:
- Interior French drains
- Vapor barriers
- Crack repairs
- Dehumidifiers
- Exterior grading and gutters
But installing sump pumps is the mechanical heart of the system. It gives the water somewhere to go—removing it efficiently and automatically. Without a sump pump, even the best-sealed walls and floors may eventually fail under pressure.
In other words, sump pumps don’t just supplement waterproofing—they complete it.
Cost of Installation
The cost to install a sump pump varies by:
- Type of pump (submersible vs. pedestal)
- Complexity of excavation
- Discharge length and layout
- Whether backup systems are included
Average cost range:
- DIY installation: $400 – $800
- Professional installation: $1,200 – $3,000
- Add backup battery: +$300 – $1,000
Considering that a single basement flood can cost thousands in repairs, mold remediation, and lost belongings, the investment in a sump pump pays for itself many times over.
Final Thoughts
Installing sump pumps is one of the most proactive and practical decisions a homeowner can make when it comes to protecting their property. Whether you’re reacting to a recent flood or planning a long-term basement waterproofing strategy, a sump pump provides consistent, automated protection from one of the most destructive forces in nature—water.
When paired with proper drainage, sealing, and maintenance, sump pumps help create a basement that’s not only dry and safe but also suitable for storage, living, or expansion. And in an age of increasingly unpredictable weather, that’s not just a smart move—it’s essential.
If you’re unsure where to begin or whether your basement is at risk, a professional waterproofing inspection can help identify your needs and recommend the best sump pump system for your home.